
Users, permissions and two-step sign-in
How to give every colleague their own Nexto user, tune the permission matrix, protect profit and payroll, switch on two-step sign-in and deactivate a leaver.
Watch this video on: YouTube
Here is a simple question. If one of your colleagues left tomorrow, how many people would still know the password to your software? In a lot of exchange offices the honest answer is: everybody, because there is one login and everybody uses it.
That is worth fixing, and not because you distrust anyone. Every voucher in Nexto keeps the name of the person who entered it, and every edit keeps the name of the person who changed it. With a shared account those names mean nothing, and the record of who did what quietly stops existing.
This episode covers the whole of that: one user per colleague, the ready-made roles and the permission matrix behind them, the three permissions that deserve special care, two-step sign-in, and the right way to handle it when someone leaves. It opens the chapter on the team and running the exchange, after the reports chapter closed with where is the profit?.
What you will learn
- Why one user per colleague is what makes the audit trail worth anything
- How to create a user, set a first password and pick a role
- What the six ready-made roles are for
- How to fine-tune access in the permission matrix without opening too much
- Which three permissions to hand out only deliberately
- How to set up two-step sign-in and what to do with the recovery codes
- Why a colleague who leaves should be deactivated, never deleted
One user per colleague
The user list is where every colleague appears with their own username, role and status. It is worth a look before you change anything: one line per person, and no line that several people share.
The rule behind the page is short. One separate user for every colleague, always. Names on vouchers are only useful if each name belongs to exactly one person, and the moment two people sign in as the same user, every question that starts with "who booked this" becomes unanswerable.
Creating a user
Step 1 - Fill in the details and pick a role
Adding a colleague takes a minute. Type the full name, choose a username, set a first password, and pick the role. Then press Create User and the account appears in the list.
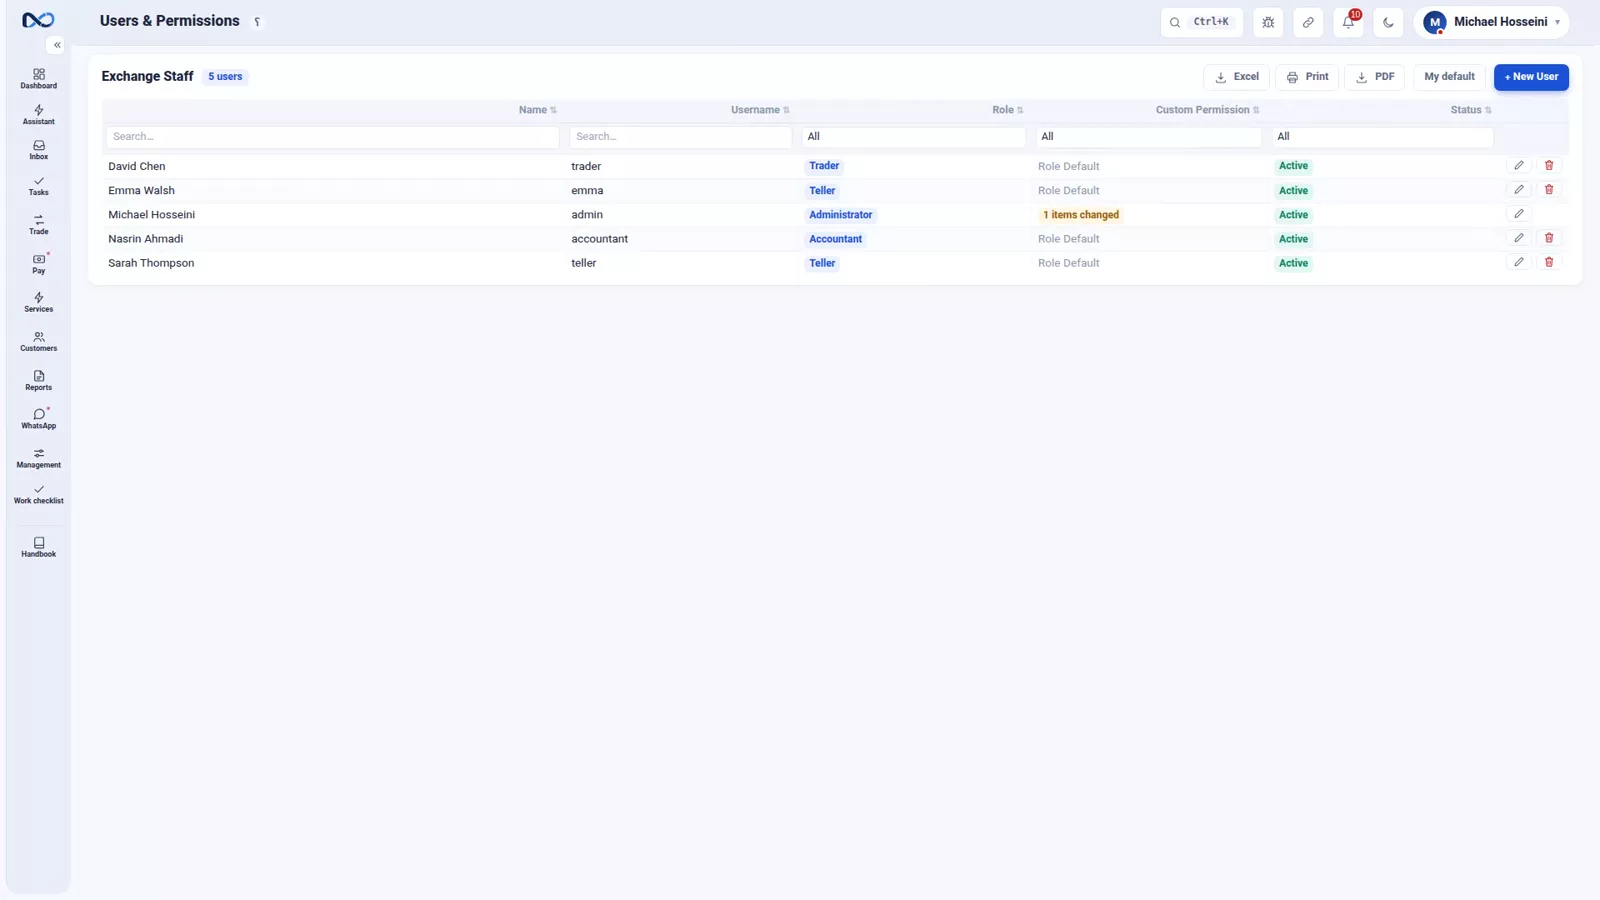
Two things are worth knowing straight away. The first password is only a starting point: the colleague changes it themselves later from their own profile. And nothing you choose here is permanent, because you can change the role or the individual permissions from the same page whenever you like.
Step 2 - Understand the roles you are choosing from
Nexto ships with ready-made roles, and for most exchange offices they are enough on their own: Administrator, Accountant, Trader, System Operator, FX Runner, and Teller. Each one is a sensible bundle of permissions for a real job in an office. The Teller, for example, is the colleague who only handles local-currency payments and has no reason to see anything else.
Start from the role that matches the job, and only then think about adjustments.
Fine-tuning with the permission matrix
If no ready-made role is exactly what you want, the user edit page has a permission matrix. Every single action in the software has its own permission: Record Buy & Sell, Set Board Rates, Account Management, View hidden accounts, unlocking a voucher for editing, and dozens more.
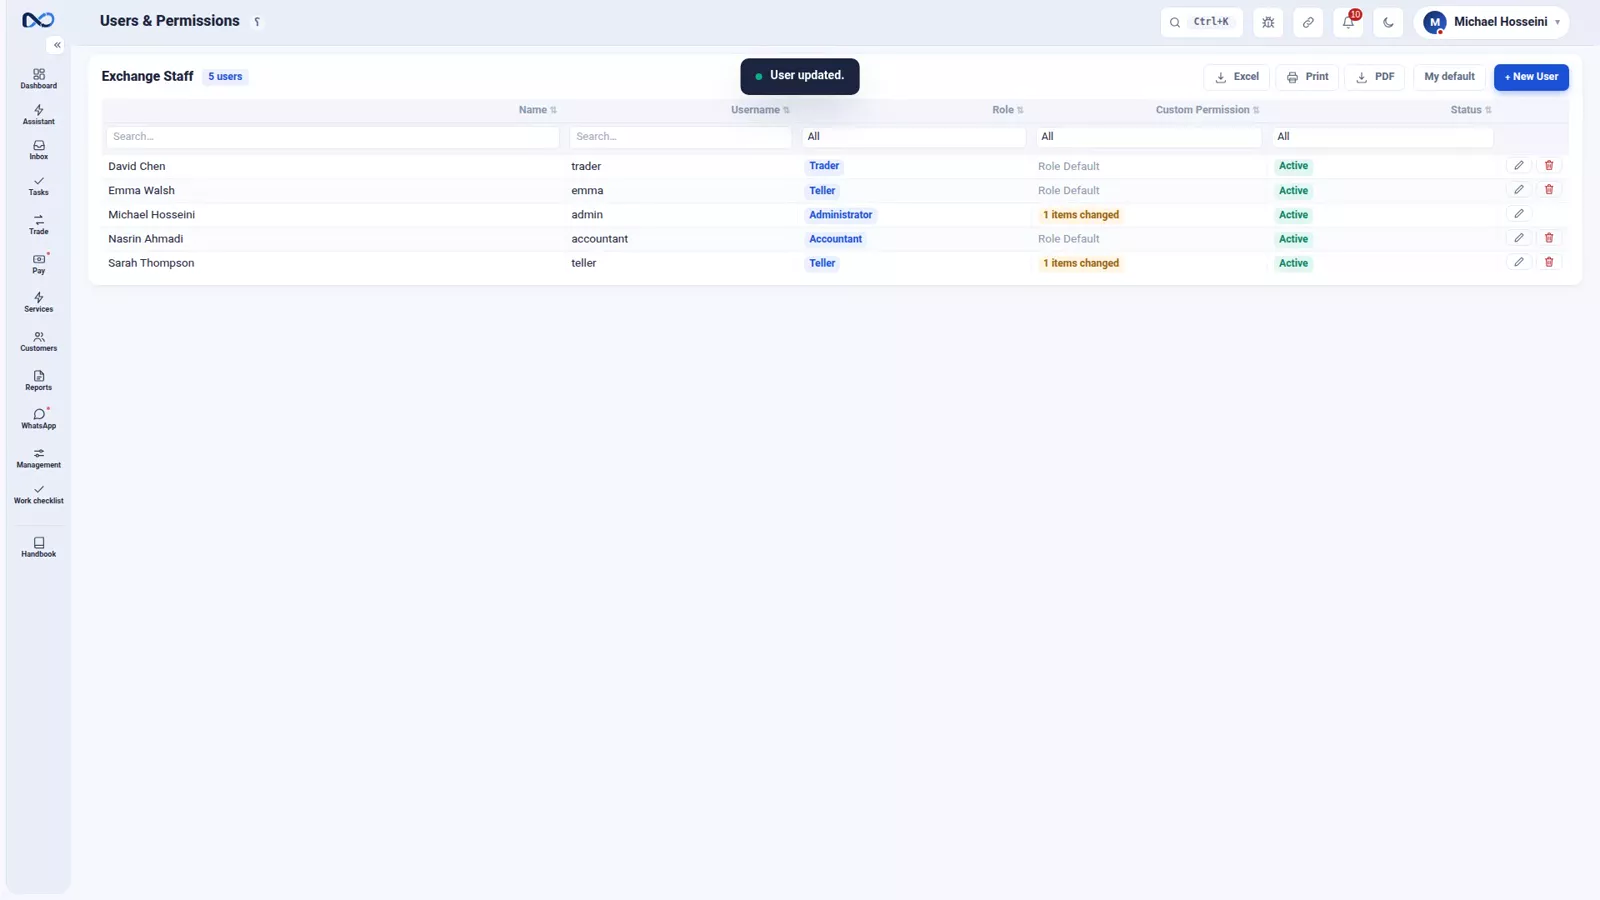
The golden rule is to give the least access needed, not the most that is possible. In the recording, a colleague on a standard role is given one extra thing, the Day summary report, and that is the whole change. Adding one more permission later takes a minute; cleaning up after one permission too many takes far longer, because by then you cannot tell what was done with it.
Three permissions to watch separately
Three permissions deserve a decision of their own rather than being swept along with a role.
- Profit & Loss Report - seeing your margin, in the reports, in the trade summary panel, on customer stats and through the assistant.
- Payroll - seeing what colleagues are paid.
- Unlocking a voucher for editing - reopening a document that has been locked.
Profit and payroll are given to nobody by default, and without them no report and no panel shows a thing. That default is deliberate: a colleague who books vouchers does not need to know your margin, and definitely does not need to know what anyone else earns.
Two-step sign-in
A password on its own is not enough. It leaks, it gets guessed, it ends up written on something near the desk. Two-step sign-in adds a second lock: after the password, a six-digit code is needed too, and that code is generated only on your own phone.
Step 1 - Set it up once
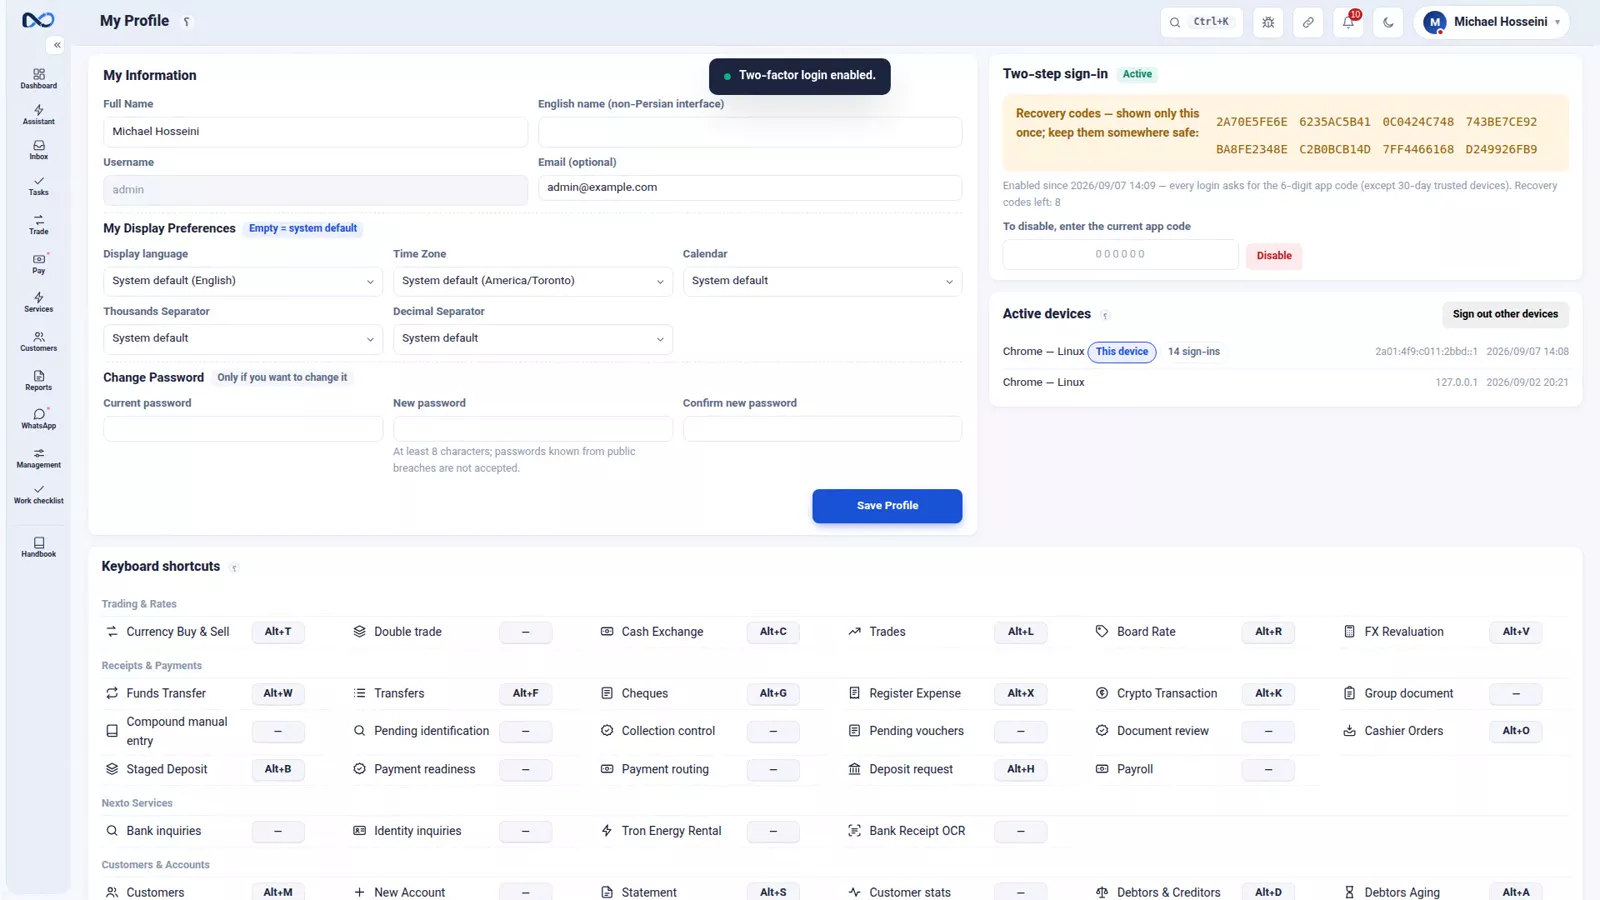
Setting it up is a one-time job on your own profile page. Press Start setup, open an authenticator app on the phone, scan the picture code that appears, and type in the first code the app gives you. Press Activate and it is done. From then on Nexto asks for a code after the password, a fresh one every time.
Step 2 - Put the recovery codes somewhere safe
Setup also gives you a set of recovery codes, and they are shown only this one time. They exist for the day the phone is not at hand. Copy them somewhere safe before you leave the page, because there is no second showing.
The recommendation from the course is narrow and firm: for the owner's account, always turn two-step sign-in on.
When someone leaves
This is the point most often forgotten. When a colleague leaves, do not delete their user. Deactivate it.
Deleting blurs the trail of everything they did. Deactivating means only one thing: they can no longer sign in. Every voucher they booked still carries their name, exactly where it was.
The change itself is one tick. Open their user, untick "User is active", and save. From that moment they cannot sign in, and if they ever come back you tick the same box again.
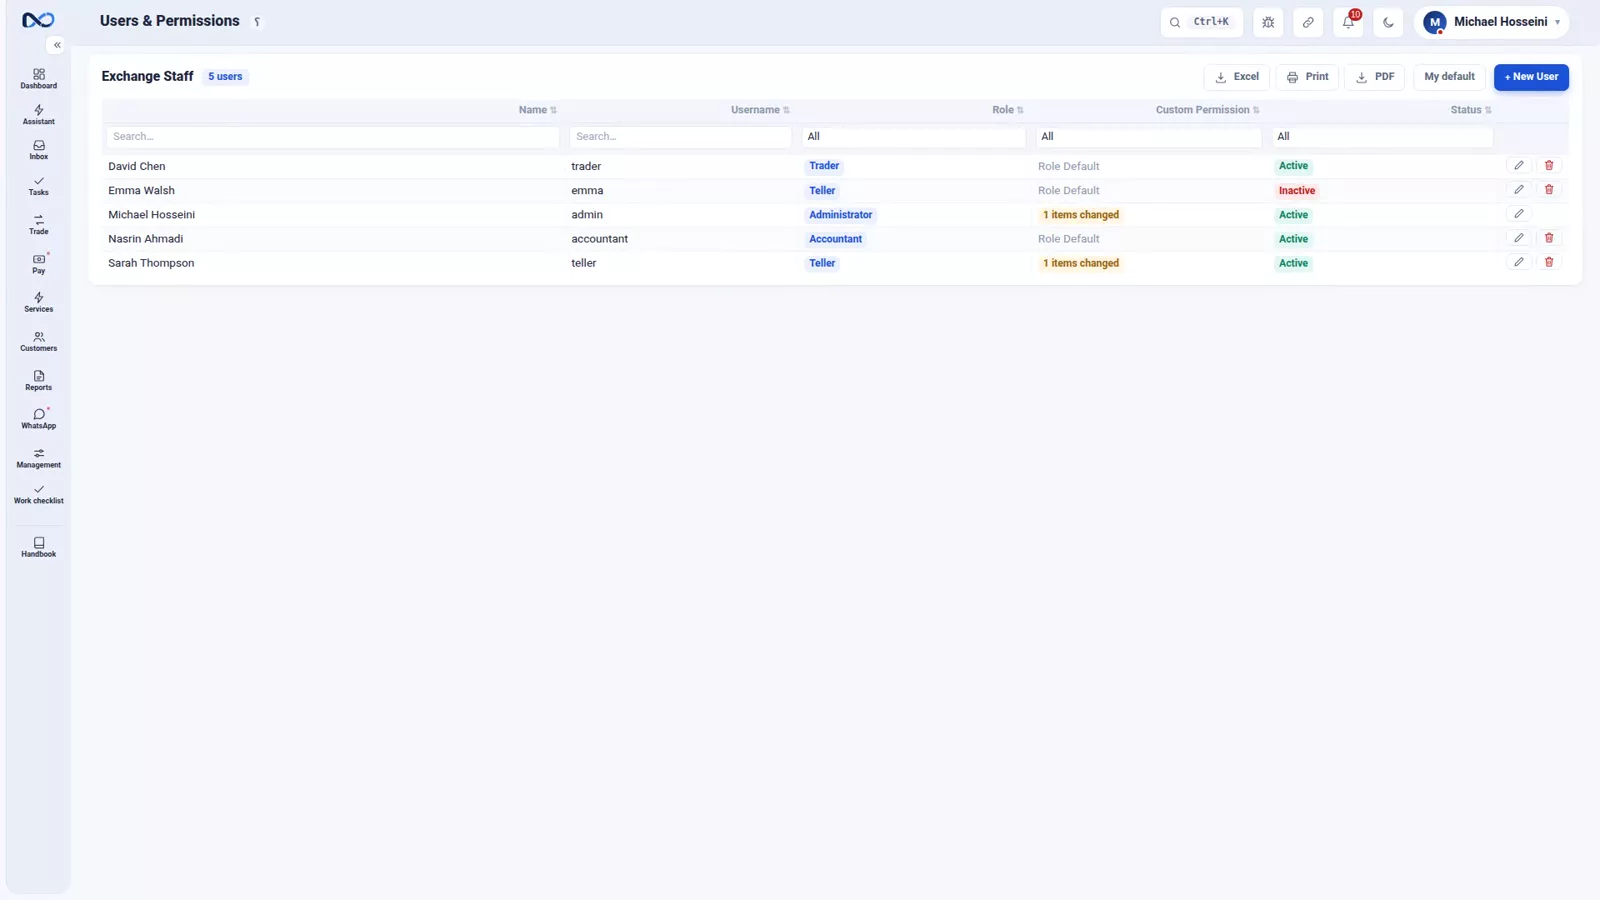
In the list they now show as Inactive, not deleted. Access given to Nexto support works on the same principle: it is temporary and it expires on its own, which backup, restore and support goes through.
Tips and warnings
- A shared login does not just weaken security, it destroys the audit trail. The names on vouchers are only worth something when each user is one person.
- Pick the role first and adjust afterwards. Building a user permission by permission from nothing is slower and easier to get wrong.
- Profit and payroll are off by default for a reason. Turn them on for a named person and a stated reason, not as part of a general tidy-up.
- The first password is a starting point only. Tell the colleague to change it from their profile on the first day.
- Recovery codes appear once. If you close the page without saving them, you are relying on the phone alone.
- Never delete a leaver's user. Deactivating keeps the history and blocks the access; deleting only does the second part badly.
Where to go next
The previous episode, where is the profit?, closed the reports chapter and explains what the Profit & Loss Report permission actually unlocks. Next comes payroll and profit sharing, which is the other permission you just protected. The first users of the office were created back in settings, currencies and your first users, the temporary support access is covered in backup, restore and support, and tasks and document review shows how the names on vouchers get used once several colleagues are working in the same file.
FAQ
Why should every colleague have their own Nexto user?
Because every voucher keeps the name of whoever entered it and every edit keeps the name of whoever changed it. With a shared account those names identify nobody, so you lose the ability to see who did what.
What roles come with Nexto?
Administrator, Accountant, Trader, System Operator, FX Runner and Teller. For most exchange offices these ready-made roles are enough as they are; the Teller, for instance, only handles local-currency payments and sees nothing else.
Can I give one user a permission that their role does not include?
Yes. The permission matrix on the user edit page has a separate permission for every action in the software, so you can add exactly what is needed on top of the role. Give the least access needed rather than the most that is possible.
Which permissions should I be most careful with?
Profit & Loss Report, Payroll, and unlocking a voucher for editing. Profit and payroll are given to nobody by default, and until they are ticked no report or panel shows those figures.
How does two-step sign-in work in Nexto?
After your password, sign-in asks for a six-digit code generated by an authenticator app on your own phone. You set it up once from your profile by scanning a picture code and entering the first code, and a fresh code is required every time after that.
Should I delete a user when someone leaves the office?
No. Deactivate the user by unticking "User is active" and saving. They can no longer sign in, every voucher they booked keeps their name, and the same tick brings the account back if they return.
Full video transcript
A simple question: if one of your colleagues leaves tomorrow, how many people know the password to your software? If the answer is that everybody shares one password, this episode is for you. The first rule: one separate user for every colleague. Not because you distrust anyone — because every voucher keeps the name of the person who entered it and every edit keeps the name of the person who changed it, and with a shared account those names mean nothing.
This is the user list: every colleague with their own username, role and status. Let's add a new user. We type the full name, we pick a username, we set a first password, and we choose the role. Nexto ships with ready-made roles — Administrator, Accountant, Trader, System Operator, FX Runner, Teller — and for most exchange offices those are enough. The Teller is the colleague who only deals with local-currency payments and needs to see nothing else.
Create User. The account now sits in the list; the colleague changes their own password later from their profile, and whenever you like you can change the role or the permissions from right here. And if a ready-made role is not exactly what you want, the user edit page has a permission matrix: every single action in the software has its own permission — Record Buy & Sell, Set Board Rates, Account Management, View hidden accounts, unlocking a voucher for editing, and dozens more.
The golden rule: give the least access needed, not the most that is possible. For Sarah we add the Day summary report, and save. Adding one permission later takes a minute; cleaning up after one permission too many takes far longer. And three permissions to watch separately: seeing profit and loss, payroll, and unlocking a voucher. Profit and payroll are given to nobody by default, and without them no report and no panel shows a thing. A colleague who books vouchers does not need to know your margin, or what anyone else earns.
And now the second lock. A password on its own is not enough — it leaks, it gets guessed, it ends up written down somewhere. Two-step sign-in means that after the password a six-digit code is needed as well, and that code is generated only on your own phone. Setting it up is a one-time job: Start setup; open an authenticator app on the phone, scan the picture code, and type in the first code. Activate. That's it — from now on Nexto asks for the code after the password, a fresh code every time.
From here on, every sign-in asks for a fresh code. And these recovery codes are shown only this one time — they are for when the phone is not at hand; keep them somewhere safe. One recommendation: for the owner's account, always. And the last point, the one most often forgotten: when a colleague leaves, do not delete their user — deactivate it. Deleting blurs the trail of their work; deactivating means they simply cannot sign in any more, while every voucher they booked still carries their name.
So we turn Emma off: we untick 'User is active' and save. From this moment Emma cannot sign in, but every voucher in her name stays exactly where it is — and if she ever comes back, you tick the same box again. In the list, Emma is now marked Inactive — not deleted. And if you ever give Nexto support access, it works the same way: temporary, and it expires on its own — we will see that in the support episode. To sum up: one user per colleague, each with the least access they need, profit and payroll only for those who should see them, and two-step sign-in for the owner.
Four things, under ten minutes, and years of peace of mind.
Try it yourself right now
A complete private demo with sample data — no installation, no credit card.
Create free demo